-
Written By Kiran Sharma
-
Updated on February 20th, 2025
How to Import PST to Office 365 Manually?Updated Solution 2025
Summary: Importing PST files to Office 365 can be a crucial task for individuals and organizations transitioning to the cloud or managing email archives. This guide provides a comprehensive, step-by-step approach to manually import PST files to Office 365 using the Azure AzCopy utility. We’ll break down each step, highlighting potential challenges and offering best practices for a smooth migration. While manual methods can be complex, this guide aims to simplify the process. We’ll also discuss when it might be more appropriate to consider automated solutions like PST to Office 365 Migration Tool.
Introduction
Personal Storage Table (PST) files are Outlook data files that store copies of messages, calendar events, and other items on your computer. Importing these files into Office 365 ensures that your important data is accessible across all devices through the cloud. This guide will walk you through the manual process of importing PST files into Office 365.
Why Import Outlook PST Files to Office 365?
There are several reasons why you might want to import PST files to Office 365:
- Cloud Migration: Moving your email data to the cloud as part of a broader migration to Office 365.
- Centralized Access: Providing users with access to their historical email data from anywhere with an internet connection.
- Compliance and Archiving: Meeting regulatory requirements for long-term email retention and archiving.
- Backup and Disaster Recovery: Storing email data in a secure, redundant cloud environment.
Prerequisites to Import PST to Office 365
Before you begin, ensure you have the following:
- Office 365 Subscription: An active Office 365 subscription with appropriate permissions to import PST files. You’ll likely need Global Administrator or Organization Management role privileges.
- Azure Storage Account: An Azure Storage account to temporarily store the PST files during the import process.
- Azure AzCopy Tool: Download and install the Azure AzCopy command-line utility from the official Microsoft website.
- PST Files: Locate the PST files you want to import.
- Mapping File (CSV): A CSV file that maps PST files to specific Office 365 mailboxes.
Now, it is time to learn how to import PST to O365.
How to Migrate PST to Office 365?
Migrating PST files to Office 365 accounts has different procedures. You can opt for either DIY approach in which you have to perform various steps. Otherwise, you can choose the automated solution. The former technique is suitable for advanced users as it requires various complicated steps.
The Automated technique involves using the professional Import PST to Office 365 Tool. It provides you an easy and effective way to migrate your data. You no need to
There are two primary methods to import PST files into Office 365:
- Using Microsoft Outlook Import/Export Wizard
- Using the Office 365 Import Service with Azure AzCopy
#1 Import Using Microsoft Outlook Import/Export Wizard
This method is suitable for importing PST files into individual mailboxes.
- Launch Microsoft Outlook on your computer.
- Access Import Feature to Navigate to File > Open & Export > Import/Export.
- Select Import from another program or file and click Next.
- Choose Outlook Data File (.pst) and click Next.
- Click Browse to select the PST file you wish to import.
- Choose the desired option for duplicate items, Click Next.
- Choose the mailbox or folder where you want to import the data.
- Ensure the option Include subfolders is checked.
- Click Finish to start the import process.
#2. Using Azure AzCopy Utility
The process of importing a PST file to an Office 365 account by using the Azure AzCopy utility consists of several steps. You need to follow them in the correct order to effectively import PST to Office 365. Follow the below steps.
Step 1: Add Import/Export Role in MS Exchange Admin Center
- Log in to the Exchange Admin Center.
- Click on the App launcher and select the Admin option.
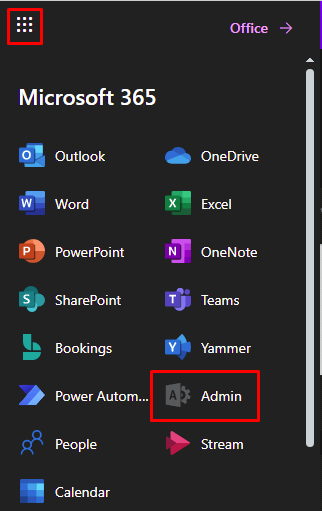
- It will open the Microsoft 365 admin center, click on the Show all tab.

- After that, press the Exchange option to open the Exchange admin center.

- Now, expand the Roles tab and select the Admin Roles option.

- Click on the Add Roles Group option.
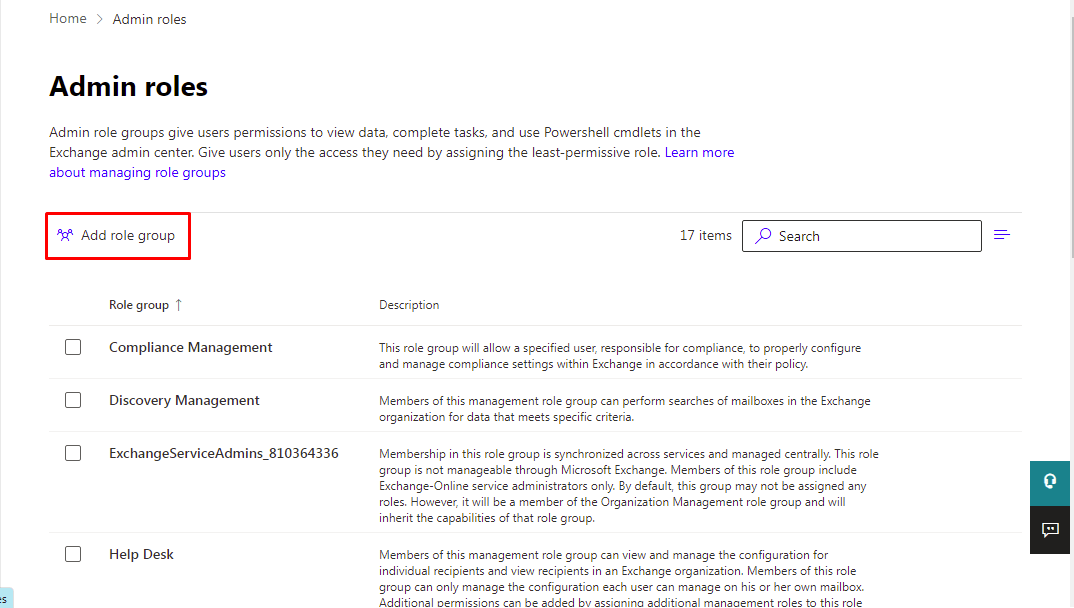
- Fill all the fields with specific details to create the Import/Export roles.
- After that, click on the Add Role Group button to finish the process.
Step 2: Upload PST Files to Azure Storage
- Download and install the Azure AzCopy tool.
- In the Microsoft 365 admin center, click on the Compliance option.
- After that, click on the Information Governance tab in the compliance center.

- Select the Import tab in the right section and click on the New import job.

- Now, fill in a suitable Job Name and Press Next.

- After that, choose Upload your Data and hit the Next button.

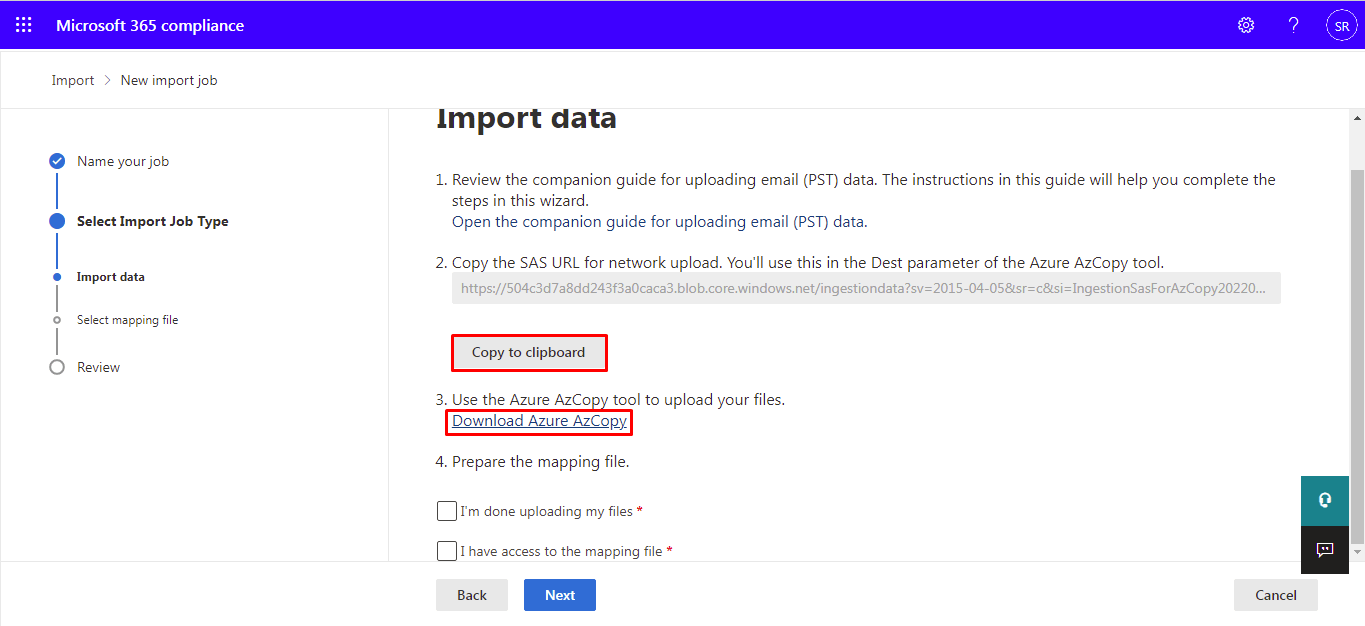
- Press the Show Network to upload SAS URL option and copy the URL.
- Open Command Prompt and use AzCopy to upload PST files.
azcopy copy ‘C:\Path\To\PSTFiles’ ‘https://.blob.core.windows.net/?’ –recursive - Replace placeholders with your actual file path and SAS URL details.

- After that, copy the URL and click on the Download Azure AzCopy.
Step 3: Upload data to Azure Blob Storage using AzCopy
Azure AzCopy is a command-line tool that helps you to upload the desired PST file to Azure Blob Storage. Further, you can export data from blob storage to Office 365. Now, follow the steps below to add PST file to Office 365.
- Create a text file and write the following command.
azcopy.exe copy “<Source location of PST files>” “<SAS URL>”
- Update the above text with the following details.
- <Source location of PST files> – location of the desired PST file in your system.
- <SAS URL> – SAS URL you copied while creating an import job.
- Now, open Azure AzCopy Tool and paste the updated text, and press Enter.
Step 4: Create Mapping File
This file maps PST files to their respective mailboxes.
- Download Template:
- In the Import Data wizard, download the sample CSV file.
- Edit CSV:
- Open the CSV file and input the required information:
Workload: Should be “Exchange”.FilePath: The name of the PST file.
- Open the CSV file and input the required information:
Step 5: Import PST to Office 365
After performing all the above steps, it is time to complete the procedure. Follow the steps below to finish the PST migration to Office 365.
- Go to the Import Job creation page and tick both the options: I’m done uploading my files and I have access to the mapping file.

- Click on the Next button to proceed further.

- Press the Select Mapping File option and add the updated mapping file. Validate it and then Save.

- After that, check the progress field for the created import job. Click on the Ready to import to Office 365 option.
- Now, select the Import to Office 365 option.
- Finally, press the Next button and then click the Import data button.
It is the complete procedure to import PST to Outlook online using the Azure AzCopy utility. If you perform all the steps accurately, you can effectively migrate your PST files to Office 365. However, as you can see, the process is difficult for a novice user. It consists of numerous steps, so it is also a complicated technique.
Disadvantages of Manual PST Import
While the manual method is possible, it has significant drawbacks:
- Complexity: It involves multiple steps and technical expertise.
- Time-Consuming: The process can take a significant amount of time, especially for large PST files or numerous mailboxes.
- Error-Prone: Mistakes in any step can lead to import failures or data corruption.
- No Granular Control: Limited options for filtering or selectively importing specific data.
- Requires Azure Subscription: Adds the overhead of managing an Azure subscription and storage.
These are the most significant reasons for not choosing manual methods. Now, what should you do? We provide you with a better solution that simplifies the migration of PST files to Office 365.
When to Consider an Automated PST to Office 365 Migration Tool
Due to the complexities and limitations of the manual method, consider using a specialized PST migration tool if:
- You have a large number of PST files to migrate.
- You need to migrate PST files from multiple sources.
- You require granular control over the migration process.
- You lack the technical expertise to perform a manual migration.
- You need to ensure data integrity and minimize downtime.
Professional Approach to Import PST Files
MigrateEmails PST to Office 365 Migration Tool is the best way to import PST to Office 365 account without performing the time-consuming and tedious manual steps. The application is developed with a simple and interactive user interface and provides you with all the advanced options for a better user experience. Therefore, it is a highly recommended option for most users. To efficiently import PST files into Office 365, the MigrateEmails PST to Office 365 Migration Tool offers a streamlined process. Follow these eight easy steps to ensure a successful migration:
- Visit the official MigrateEmails website to download the PST to Office 365 Migration Tool.
- Click on the “Add File” button to browse and select the PST files you wish to import.
- Once the files are added, the tool will display a detailed preview of the PST data, including emails, contacts, calendars, and attachments.
- After, select Office 365 as output email client form the drop down menu.
- Click on the “Login” button to enter your Office 365 account credentials.
- hoose the specific Office 365 mailbox or folder where you want to import the PST data.
- Utilize the filter options to include or exclude specific data based on date ranges, email addresses, or folders.
- After configuring all settings, click on the “Start Migration” button.
Conclusion
Importing PST files to Office 365 manually is a viable option for small-scale migrations when you have the technical expertise and time. However, for larger, more complex migrations, an automated PST migration tool is highly recommended to streamline the process, minimize risks, and ensure a successful outcome.
FAQs
Is it possible to import PST files without using Outlook?
Yes, the Office 365 Import Service allows you to upload PST files directly to Azure Storage and import them without using Outlook.
Are there any size limitations for importing PST files?
While Office 365 supports large mailboxes, it’s recommended to keep PST files under 50 GB for optimal performance.
Are there third-party tools available for PST to Office 365 migration?
Yes, tools like the MigrateEmails PST to Office 365 Migration Tool offer a streamlined process for importing PST files into Office 365.
About The Author:
I am Kiran Sharma, a Technical Expert in Content writing. I have technical expertise in the field of Email Backup, Data Recovery, and Email Migration, and resolve technical queries related to Cloud Backup or Email Migration for individuals and businesses.
Related Post


